

Throughout my years of researching and writing Nyonya recipes, this cookie has been extremely elusive and the most difficult for many reasons. My grandmothers never made these cookies when I was young, contrary to what many think of the superwoman Nyonya cook – I only recall them coming home with plastic containers filled with these bright white morsels and tasking the grandchildren to place red dots with toothpicks dipped in red dye. However, my father recalls seeing his mother make it during his youth with a covered kuali/wok over woodfire. Furthermore, I came across recipes that either were not successful or required sago flour that is impossible to find outside of Malaysia. So, in a way, I was either afraid of trying again or I had just thrown in the towel, literally!
However, my love for these sweet treats did not diminish with time, and my recollections of them were always the fondest and warmest memories of my grandmothers whipping up a culinary storm in the weeks of preparation for the Lunar New Year. Recently, I came across some recipes in Nyonya food groups on Facebook, and I noticed that the cookies were made with only tapioca flour which is easily available – this stirred up my curiosity and interest in it again. Besides, the beautiful wooden cookie moulds given by my sister years ago were gathering dust and beckoning me to give it another try. So I printed out a few versions and I studied them before I made a couple of batches. Below is my version of it.
Making Kueh Bangkit is deceptively tricky. The baking or frying of the flour with pandan leaves is to infuse it with the leaves’ aroma as well as to dry the flour out to produce a mouth-melting product. The use of the egg yolk with hardly any egg white attached is to avoid the stiffening protein from the white, and it is beaten with the sugar to lighten its yellow color – get store-bought and not farm eggs so that the dough will stay quite white. The dough has to be formed with just the right amount of coconut cream, not the milk, so that it is not only rich in flavor, but the cookie is flaky and soft due to the lack of excess water. The baking has to be at the right temperature and timing so that it is cooked but without the slightest browning. And finally, it has to be cooled down for a day so that the inside moisture distributes evenly throughout the cookie before it is consumed. In other words, lots of attention and precision must be given to the whole process, just like any wonderful complicated pastry.
When I showed the results of my cooking online in a group for expats in the USA, a lady remarked that there were so many good cooks and bakers in the group. I replied that necessity is the mother of invention, and so is nostalgia. I hope you are able to produce a successful bunch with my recipe and envelope yourself with fond memories of this cookie and growing up eating it.
I have provided an alternative it you do not possess a Kueh Bangkit mould.
Note: I tried another batch today using the baked flour straight out of the oven and once cooled down, and the end product had no noticeable difference compared to those made with 2-day old baked flour, as recommended by many Nyonya and recipes. I also made cookies with a 1¼-inch/3-cm cutter, and the recommended cooking time was fine.
Printable Copy (link) – Recipe from Edible Memories e-cookbook
Makes around 60 cookies, 6 grams each
Flour Preparation: 1 hour 30 minutes, plus minimum 30 minutes cooling
Cookie Preparation: 1 hour
Cooking Time: 15 minutes plus cooling time
Ingredients:
250 grams/8.8 oz tapioca starch/flour (very fine)
3 pandan leaves, fresh or frozen
60 grams/2.1 oz confectioners/icing sugar or caster sugar (very fine)
1 egg yolk, making sure as little egg white is attached
2 cans (400 ml each) coconut milk, the creamiest kind, or 800 ml fresh coconut milk
⅛ teaspoon regular salt
Red food coloring
Toothpick
Tools:
Baking or Parchment paper, not wax paper (optional)
Baking tray, large
Pastry brush, small (optional)
Kueh Bangkit mould or 1¼-inch/3-cm cookie cutters
Step 1 (can be made in advance): Turn the oven on to 300F/ 150C with the rack in the middle shelf. Pour the flour into a baking container or aluminium foil shaped like a bowl on a tray (for easy cooling later). Wipe the pandan leaves clean, cut into 2-inch/ 5-cm pieces, and hide them in the flour with equal spacing. Place flour into the oven and bake for 1 hour 30 minutes.
Alternative: fry this in a dry wok on medium-low heat for at least 45 minutes, stirring very gently (or the flour will fly everywhere) until the pandan leaves are dry and slightly brown.
Meanwhile, place the coconut milk into the coldest part of the fridge.
Step 2: Once baked, remove the flour from the oven. If it is to be used immediately, remove the foil onto a plate or pour the flour onto a cooler pan. Remove the pandan leaves carefully trying not to break the dried leaves. Allow to cool for around 30 minutes or more to room temperature. If reserving for another time, cover it with some plastic film once cooled. Sift the flour to measure 200 grams in a bowl, and the rest into a smaller bowl (around 2 tablespoons worth) – be careful not to pass pieces of dried pandan leaf through it.
Step 3: Remove the fresh coconut milk or 1 can from the fridge – the cream should have solidified slightly on the surface. Gently scoop the cream, while avoiding the separated water, to measure 100 grams worth – open the other can if more is needed. Add the salt and stir well. Set aside. Return the rest to the fridge to be chilled if more is needed.
Step 4: In a mixing bowl, add the sugar, and make a well in the middle. In the middle, add 3 tablespoons coconut cream and the egg yolk. Using a large whisk or hand mixer, gently beat this mixture for around 3 minutes until the yolk is pale in color and the mixture is completely smooth and it does not feel granular to touch (to make sure that the sugar is completely dissolved especially if using caster sugar).
Step 5: (will take around 30 minutes): Add the flour in 3-tablespoons increments to the sugar-egg mixture and mix well using a spatula. Add more flour until the mixture is quite stiff. At this point, add 1 tablespoon coconut cream and mix with the spatula, breaking up the dough. Add more flour and mix with your hands as you rub the dough pieces with your fingers. Continue adding the cream until 50% of it is used and all the flour has been added. You should have a very dry crumbly mixture.
Continue to add the coconut cream by ½-tablespoon increments by dripping it evenly over the dough. Use your fingers to break the larger dough pieces when mixing it. Continue to add the cream (not all used) until the dough barely comes together when gathering a handful into a ball – it should still crumble when pressure is applied. Cover with plastic film or moist kitchen towel.
Step 6: Turn the oven on to 300F/ 150C with the rack in the middle shelf. Place a baking/parchment paper big enough on a large baking tray – optional.
Step 7: Using a small pastry brush, dip it in the reserved excess flour and dust the mold indentations well. Shake off any excess but do not tap it on the countertop. Grab a small palmful of dough and squeeze hard to make it come together. Push the dough into the mold pattern making sure that it covers the whole indentation by pushing the dough quite firmly and evenly, with excess over the sides and mould top level (the dough should be a bit crumbly and fall apart easily – don’t panic).
When all the patterns in the mould are filled this way, use a butter knife to slide down the mould to shave off any excess. Turn the mould over and tap out the cookies on one end of the tray – you may have to turn the mould on the other end to tap out some stubborn ones. Repeat the process by dusting the moulds first. Arrange the cookies on the tray and use the brush to brush aside any fine bits of dough in between the cookies to a corner – remove with a spoon. If the dough is sticking to the mould, use a skewer or toothpick to clean the indentations before making the next batch of cookies.
Alternative: Roll or press down with hand on dough in small batches into ½-inch/ 1-cm thickness – if it is too crumbly, add a bit more coconut cream until it holds together more. Use the cookie cutters to cut the dough and transfer to the tray. Or you can push the original recipe dough into the cutter sitting on the tray to the above thickness.
Step 8: When the oven is hot enough, place the cookies in the middle rack with equal spacing from the oven walls. Set the timer to 15 minutes. At the halfway mark, rotate the pan so that the back of the tray is now in the front. The cookies should be colorless and as white as possible.
Step 10: After 15 minutes, turn the oven off and leave the cookies to cool down completely inside the oven. When cool, remove from the oven. Using the red food dye, dip the broader end of the toothpick into the dye and place a dot on the cookie, preferably the eye or the center.
Once cooled, place them in a storage container but do not close the lid tight for a day. They are best eaten the following day and after.

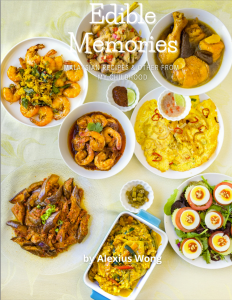
The hardcopy and e-book of The Baba Nyonya Peranakans book (1st image) and Edible Memories e-cookbook (2nd image) are available – more information on the Homepage.

Hi, after baking the flour, there was quite a lot of hard clumps of flour remaining so it was difficult to sift. Is this normal?
LikeLiked by 1 person
I had a few attached to the pandan leaves. You can still press them through the sieve to break them up.
LikeLiked by 1 person
Thank you for sharing your recipe. When using frozen pandan leaves, should you thaw them and dry them before baking with the flour or can you bake with the flour while the pandan leaves are still moist?
LikeLike
In this case, it won’t matter much. But you can thaw and dry them in case. I have used them straight from the freezer. Let me know how this recipe turns out.
LikeLiked by 1 person
Thank you. I’ll give it a go and let you know.
LikeLike